Category:Architecture/ARM
| You are here | ARM
|
Description
What is ARM?
The Advanced RISC Machines (ARM) architecture can be found on numerous equipments (e.g. mobile devices, Raspberry Pi, routers, ...).
ARMv3 to ARMv7 versions are based on 32bits. 64bit has been introduced in ARMv8. A THUMB version exists in 16bits.
Extensions
Additional extensions can be added to the processor:
- Jazelle (J): add Java bytecode to be executed natively on the processor
- Thumb (T): adds instructions that can be 16 or 32 bits wide
- Debug (D): enable to analyze the physical processor using special debugging hardware
Processor Modes
In ARM, privileges are defined by 8 different modes:
- User (USR): unprivileged mode under which most tasks run
- Fast Interrupt Request (FIQ): entered when a high priority (fast) interrupt is raised
- Interrupt Request (IRQ): entered when a low priority (normal) interrupt is raised
- Supervisor (SVC): entered on reset and when a Software Interrupt instruction is executed
- Monitor (MON)
- Abort (ABT): used to handle memory access violations
- Undefined (UND): used to handle undefined instructions
- System (SYS): for ARMv4 - privileged mode using the same registers as user mode
Registers
| Register | Description |
|---|---|
| r0 ... r10 |
General registers: can be used for whatever computation!
|
| r11 (fp) | Frame Pointer: equivalent to EBP in X86 assembly |
| r12 (ip) | Intraprocedure Register: stores volatile information when code jumps from a function to another |
| r13 (sp) | Stack Pointer: equivalent to ESP in x86 assembly |
| r14 (lr) | Link Register: used to store the address of the function return when function is called with branch with link |
| r15 (pc) | Program Counter: contains the instructions to execute next |
| cpsr | Current Program Status Register: special register used by some instructions (e.g. conditional instructions) |
Calling convention
In ARM assembly, function parameters are first saved to registers (r0, r1, r2, ...) and the function is called. The return value is saved in r0 (equivalent to EAX in x86 assembly).
MOV     R0, #0x20       ; block size
BL      xmalloc
MOV     R3, R0          ; r0 = return
Running ARM
ARM physical device
The easiest way to debug an ARM executable is to run gdb on an ARM-based device such as a Raspberry Pi or an Android phone. However, for security reasons, it could be more careful to run the application in an emulator.
Emulation
qemu-arm
You can also debug an ARM executable using qemu. To do that, you will need to use a client/server configuration (notice that in our example, both are run on the same machine, hence the IP 127.0.0.1 used to remotely connect to the server).
| Step | Server side | Client side |
|---|---|---|
| Installation |
$ sudo aptitude install qemu-user |
$ sudo aptitude install gdb-multiarch |
| Debugging |
$ qemu-arm -g 1234 ./chall9.bin password |
$ gdb-multiarch -q -nx (gdb) file chall9.bin Reading symbols from /home/mitsurugi/chall/R/chall9.bin...done. (gdb) set architecture arm The target architecture is assumed to be arm (gdb) target remote 127.0.0.1:1234 Remote debugging using 127.0.0.1:1234 [New Remote target] [Switching to Remote target] 0x00008150 in _start () |
qemu emulator

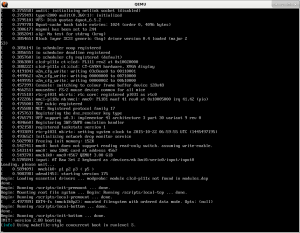
You can also install an ARM-based Operating System for more control. In the following section, I'll explain how to install a Debian-ARM based distribution over qemu.
First create a raw space of 3Gigabytes for the future OS:
$ qemu-img create -f raw hda.img 3G
Then download the Debian image:
$ wget http://ftp.debian.org/debian/dists/wheezy/main/installer-armhf/current/images/vexpress/netboot/initrd.gz
$ wget http://ftp.debian.org/debian/dists/wheezy/main/installer-armhf/current/images/vexpress/netboot/vmlinuz-3.2.0-4-vexpress
Start the installer and finish the installation:
$ qemu-system-arm -M vexpress-a9 -kernel vmlinuz-3.2.0-4-vexpress -initrd initrd.gz -append "root=/dev/mmcblk0" -drive if=sd,cache=unsafe,file=hda.img
Once the installation is done, stop the qemu emulator and enter the following commands to be able to boot the machine normally. Note that if you don't do that, the machine will start over with the installer instead of booting the OS.
$ file hda.img
hda.img: DOS/MBR boot sector; partition 1 : ID=0x83, active, start-CHS (0x0,32,33), end-CHS (0x18,186,34), startsector 2048,
395264 sectors; partition 2 : ID=0x83, start-CHS (0x18,186,35), end-CHS (0x16f,167,56), startsector 397312, 5509120 sectors; partition 3 : ID=0x5, start-CHS (0x16f,200,24),
end-CHS (0x187,126,55), startsector 5908478, 380930 sectors
$ mkdir mountdir/
$ mount -o loop,offset=$((512*2048)) hda.img mountdir/
$ cp mountdir/initrd.img-3.2.0-4-vexpress .
$ umount mountdir/

Now, you should be able to boot the environment with the following command:
$ qemu-system-arm -M vexpress-a9 -kernel vmlinuz-3.2.0-4-vexpress -initrd initrd.img-3.2.0-4-vexpress -append "root=/dev/mmcblk0p2" -drive if=sd,cache=unsafe,file=hda.img
The machine should have IP address 10.0.2.15. You should be able to ping your physical interface (10.0.2.2) from the emulator. Here is how it is designed;
  ┌─────────────────────────┐
  │ Guest operating system  │
  │                         │
  │     ┌─────────────┐     │
  │     │ virt. netw. │     │
  │     │    device   │     │
  └─────┴──────╥──────┴─────┘
               ║
  ═══╦═════════╩═══╦═════════════╦══
     ║             ║             ║
     ║ 10.0.2.2    ║ 10.0.2.3    ║ 10.0.2.4
     ║             ║             ║
  Gateway         DNS           SMB (optional)
     ║
     ║
     ▼
Host network
For more advanced network configuration, refer to this page.
ARM instructions
A |
B |
C |
L |
M |
S |
Subcategories
This category has the following 10 subcategories, out of 10 total.
A
Pages in category "Architecture/ARM"
The following 3 pages are in this category, out of 3 total.
