Autoscan
Description
AutoScan-Network is a powerful and fast (multi-threaded) network scanner developed by Thierry Lagarde. It discovers hosts on a network and scans the ports.
Some of AutoScan-Network's characteristics:
- Automatic network discovery
- TCP/IP scanner
- Wake on lan functionality
- Port scanner
- Low surcharge on the network
- VNC Client
- Telnet Client
- SNMP scanner
- Simultaneous subnetworks scans without human intervention
- Realtime detection of any connected equipment
- Supervision of any equipment (router, server, firewall...)
- Supervision of any network service (smtp, http, pop, ...)
- Automatic detection of known operatic system (brand and version), you can also add any unknown equipment to the database
- The graphical interface can connect one or more scanner agents (local or remote)
- Scanner agents could be deployed all over the network to scan through any type of equipment (router, NAT, etc)
- Network Intruders detection (in intruders detection mode, all new equipments blacklisted)
- Complete network tree can be saved in a XML file.
- Privileged account is not required
It is compatible with following OSs:
- Mac OS X 10.5 or later
- Microsoft Windows (XP, Vista)
- GNU/Linux
- Maemo 4
- Sun OpenSolaris
Installation
This paragraph depicts the installation under a Linux distribution. The following has been tested under Kubuntu 10.04.
$ cd /data/src/
$ wget http://downloads.sourceforge.net/project/autoscan/AutoScan/autoscan-network%201.50/AutoScan-Network-Linux-1.50.bin.tar.gz
$ tar xzvf AutoScan-Network-Linux-1.50.bin.tar.gz
$ sudo sh AutoScan-Network-Linux-1.50.sh
You will be presented with a GUI for the installation.
Then optionally create a launcher in your /pentest/ directory:
$ mkdir -p /pentest/scanners/autoscan/
$ cd /pentest/scanners/autoscan/
$ vim autoscan
Report following lines and save the file (:x command in vim):
#!/bin/sh
cd /opt/AutoScan/bin/
./autoscan-network
Make your file executable:
$ chmod +x autoscan
Check that Autoscan opens by issuing (in /pentest/scanners/autoscan/):
$ ./autoscan
Usage
Menu
Menu items
- Add a network: Enable to add a new network configuration
- View: Group results by categories (server, unknow, wifi, workstation, ...)
- Save: Save search results
- Search: Search by mac address, ip address, hostname or open port
- Settings: Open the preferences window
- Notification: Activate the notification for selected host(s)
- Intrusion Alert: Activates the host live discovery (considered as intrusion)
- Help: Open default browser in official homepage
- About: Show splash screen
- Console: Show debugging information
- Exit: Quit the application
Add a network
This is a prerequisite to a scan operation. Autoscan-network detects the network your machine is connected to to scan it.
You can then save and restore these settings from the menu.
View
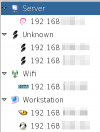
This enables to change view (click many times on the icon to swtich from one view to another):
- List view: Default view, displaying hosts sorted by IP address
- Grouped view: This view groups hosts by category (wifi, workstation, server, unknown, ...)
Search

Enables to quickly jump to a host by entering one of this criteria:
- Mac address
- IP address
- Host name
- Open port
Settings
General tab

- Minimize to tray icon: Minimize Autoscan-network when reduced
- Start minimized: Automatically minimize Autoscan-network when started
- SMTP: Define a SMTP server to be able to send notifications.
Ports tab
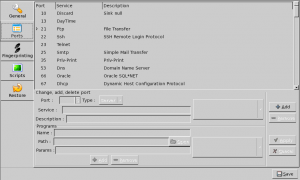
This enables to manage ports in Autoscan-network:
- Add a new port definition
- Remove a port definition
- Modify an existing port definition
It also enables to attach:
- a picture to each service (for an easy visual identification)
- a program to connect to the service
Fingerprinting tab
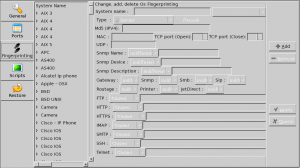
Autoscan-network is capable of identifying hosts OSs and hardware types thanks to its signatures database. When an unknown hardware is discovered, a window is automatically opened, offering the possibility to manually add it to the database.
This screen also enables to manage signatures:
- Add a new signature definition
- Remove an existing signature definition
- Modify an existing signature definition
The signature definitions are based on the support of services (Snmp, Gateway, Smb, Sip, Routage, Printer, JetDirect) and on the services responses types (FTP, HTTP, HTTPS, IMAP, SMTP, SSH, Telnet).
Scripts tab
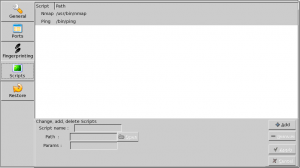
Some scripts must be installed on the machine for AutoScan-Network to be able to run scans:
- Nmap: default location in /usr/bin/nmap
- Ping: default location in /bin/ping
It is possible to add and remove tools by using appropriate icons (Add, Remove, Apply).
Restore tab
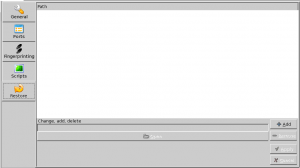
At the end of a scan, you can save your tree structure (XML file) by clicking on the "Save" icon from the menu.
This can then be automatically restored each time you start AutoScan-Network. Simply click on "Open" to locate your XML file, then on "Apply" and "Add".
Click on the "Save" button to save the preferences.
Notification
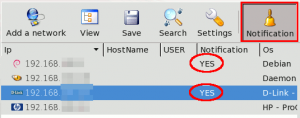
By selecting a host from the scan results and by clicking on the "Notification" icon from the menu, it is possible to *follow* selected gear. This way, a mail will be sent to you (see settings to parameterize SMTP server) each time the state of the equipment changes (e.g. ports scan gaps).
Intrusion Alert
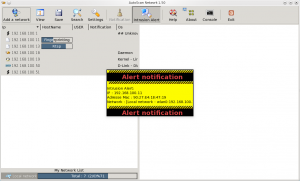
The intrusion alert is a live scan of your network. Once you have activated it, every hardware detected after the activation will popup an alert, providing basic information on detected host:
- IP address,
- Mac address.
The discovered host will automatically be added to the network and will be scanned.
Host details
Summary
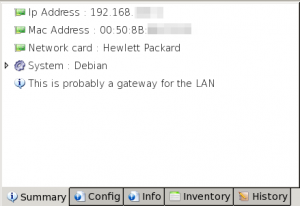
This tab shows a basic information on selected host:
- IP address
- Mac address
- Network card (vendor)
- System and MD5 signature
- System Group

Config
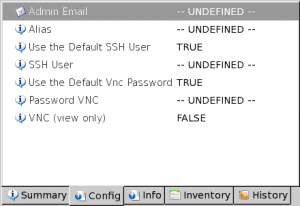
AutoScan tries to gather configuration information on selected host:
- Admin Email: Tries to gather an admin email address (e.g. from an Apache Wlecome Page)
- Alias: Tries to gather host alias if any
- Use the default SSH user: Tries to check if host use the default SSH user
- SSH user: Tries to gather a SSH user
- Use the default VNC password: Tries to check if host uses default VNC password
- Password VNC: tries to show VNC password
- VNC (view only): true|false
Info
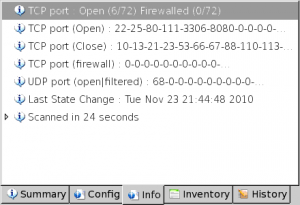
This tab shows information on ports:
- TCP port: list of open/filtered TCP ports
- TCP port (Open): list of opened TCP ports
- TCP port (Close): list of closed TCP ports
- TCP port (firewall): list of filtered TCP ports
- UDP port (open|filtered): list of open or filtered UDP ports
- Last State Change: Last date/time of scan
- Scanned in x seconds: Scan time
Inventory
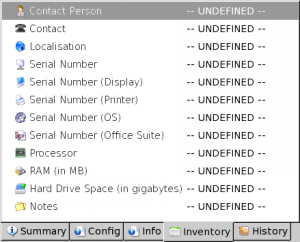
AutoScan-Network will try to gather following information on selected host:
- Contact person
- Contact
- Localisation
- Serial Number
- Serial Number (Display)
- Serial Number (Printer)
- Serial Number (OS)
- Serial Number (Office Suite)
- Processor
- RAM (in MB)
- Hard Drive Space (in GB)
- Notes
History

This tab shows AutoScan-Network history of selected gear, if any. In case there is no history, it displays "This equipment was found".
Ports details
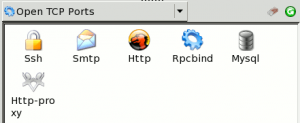
By clicking on a host from a scan result, it displays a list of open ports/services running on the machine.


